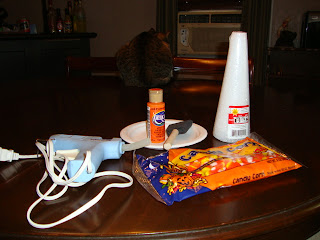
Supplies:
2 Styrofoam cones
2 bags of candy corn
orange paint, sponge brush, glue gun and glue
I started by painting the cones orange. The cone needs a good coat of paint because the cone will show through the candy corn. The Diet Dr. Pepper is not necessary, but it's good to stay hydrated.
Squeeze a thick line of hot glue onto the cone. You want to squeeze just enough that you can work with before it dries. Then place the candy corns flat against the cone making rings around the cone.
Not all rows will work out even and there will be gaps that are too big to leave empty, so I stuck a candy corn on it's side when I encountered this.
Because I wanted different heights and chose to use standard dollar store cones, I found these rocking candle holders at Savers. I love walking into Savers and finding exactly what I want and paying exactly what I want to.
This project is just the first of my Halloween projects that I'm slowly finishing up. Hopefully this week I'll have 2 or 3 more posted. One is having technical difficulties that I hope to resolve tomorrow.


This is great. I'd made a cookie cone version last month for my daughter's 1st birthday (from a tutorial on Prudent Baby), but this is a great way to do it in a Halloween theme.
ReplyDeleteThey are too cute!! :)
ReplyDeleteThose are so cute, I really like how you have them displayed.
ReplyDeleteVery cool looking cones. I may have to try that. :D I love candy corn though, so I might eat more then I glue :D
ReplyDeleteVery neat. Halloween is my Fav holiday!! I have to agree with Jenny. I would probably eat half the bag.
ReplyDeleteAwesome! I LOVE these!!!
ReplyDeleteMarla, as a candy corn afficionado I must say....BRAVO! Love this playful nod to the classic seasonal treat!
ReplyDeleteI'm so thrilled and honored to be in such good, talented, and dynamic company with the Toucan Tribe!!
Warmest wishes, Jenn